- Table of Contents
- Related Documents
-
| Title | Size | Download |
|---|---|---|
| 03-Logging in to the device | 535.54 KB |
Logging in through Telnet or SSH
Logging in through the console port
Logging in from the Web interface
Logging in to the WBC monitoring platform
Logging in to the WBC monitoring platform from a management port on the module
Logging in to the WBC monitoring platform from the service port on the module
Logging in to the Cloudnet platform
Logging in to the device
You can log in to a device through Telnet, SSH, or the Console port, or from the Web interface.
· Telnet/SSH login—Log in to the device through a remote connection to configure or manage the device.
· Console port login—Log in to the device locally. This method is the basis for configuring the other login methods.
· Web interface access—Log in to the device from the Web interface to perform basic device configuration and management tasks.
Logging in through Telnet or SSH
To log in to the device through Telnet or SSH, use a terminal emulator program, such as HyperTerminal or PuTTY, to establish a connection to the device.
The device is enabled with Telnet and SSH services by default. Both the default login username and password are admin.
Configure Telnet login
1. Use Telnet to access the default IP address 192.168.0.100.
2. Enter the default username and password as prompted. For security purposes, change the login password after successful login.
Configure SSH login
1. Use SSH to access the default IP address 192.168.0.100.
2. Enter the default username and password as prompted. For security purposes, change the login password after successful login.
Logging in through the console port
About this task
Console port login is one of the basic device login methods. This method allows you to access the device by using a console cable for system maintenance.
Prerequisites
Before logging in to the device through the console port, prepare the following tools:
· Console cable—An eight-core copper cable with an RJ-45 connector at one end and a DB-9 connector at the other end.
· Configuration terminal—A character terminal with an RS-232 interface or a PC.
|
|
NOTE: · When you connect a PC to the device, first connect the DB-9 connector to the PC and then connect the RJ-45 connector to the console port as a best practice. · When you disconnect a PC from the device, first remove the RJ-45 connector and then remove the DB-9 connector as a best practice. · If the PC does not have an RS-232 interface but has an USB port, use a USB-to-RS-232 adapter to connect the console cable. You must also install the corresponding driver program. |
Configure terminal parameters
As shown in Figure3-1, use a terminal emulator program, such as HyperTerminal or PuTTY to connect the configuration terminal to the device.
Figure3-1 Connecting the PC to the device

Configure the terminal parameters as follows:
· Bits per second—9600.
· Data bits—8.
· Stop bits—1.
· Parity—None.
· Flow control—None.
Logging in to the device
Power on the device. The following information appears on the terminal screen:
System is starting...
Booting Normal Extend BootWare.
……
System application is starting...
Startup configuration file does not exist.
User interface con0 is available.
Press ENTER to get started.
After the device self-test finishes, press Enter to access the CLI.
Logging in from the Web interface
About this task
For users to configure and maintain network devices, the device provides a Web interface.
The device is enabled with HTTP and HTTPS services by default. Both the default login username and password are admin.
Procedure
To log in to the device from the Web interface through a wired connection:
1. Visit the default IP address 192.168.0.100 to access the local Web interface.
2. Enter the default username and password, and then click the login button. For security purposes, change the login password as prompted.
Logging in from the module
As a best practice, use one of the following browsers on the PC to access the Cloudnet platform:
· Internet Explorer 11 or higher.
· Mozilla Firefox 45.0.2 or higher.
· Google Chrome 50.0.2661.87 or higher.
· Safari 6.0 or higher.
To ensure successful Web access, make sure the browser in use can accept first-party cookies (cookies from the site of the Web interface) and is enabled with active scripting (or JavaScript). The names and configuration methods for the features might differ in different browsers.
If an Internet Explorer is used, make sure the following features are enabled:
· Script ActiveX controls marked safe for scripting.
· Run ActiveX controls and plug-ins.
Logging in to the WBC monitoring platform
You can log in to the WBC monitoring platform from a management port or the internal service port on the module.
Logging in to the WBC monitoring platform from a management port on the module
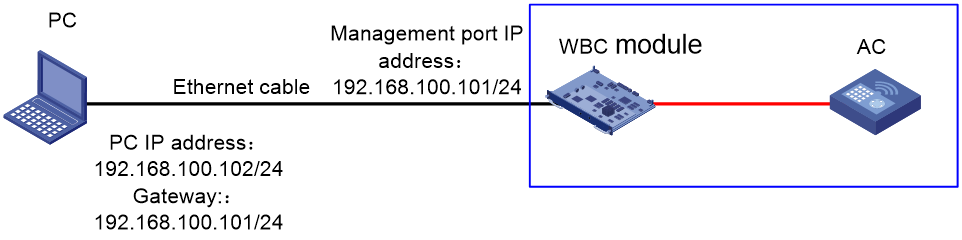
1. Set up the network environment as shown in the following figure. Configure IP settings to ensure the connectivity between the PC and the front management port on the WBC module.
Figure3-2 Setting up the network environment
2. Use an Ethernet cable to connect the PC to the management port on the module. Enter https://x.x.x.x:9999 in a browser to access the WBC monitoring platform login page. x.x.x.x represents the IP address of the management port, which is 192.168.100.101 by default.
Figure3-3 WBC monitoring platform login page
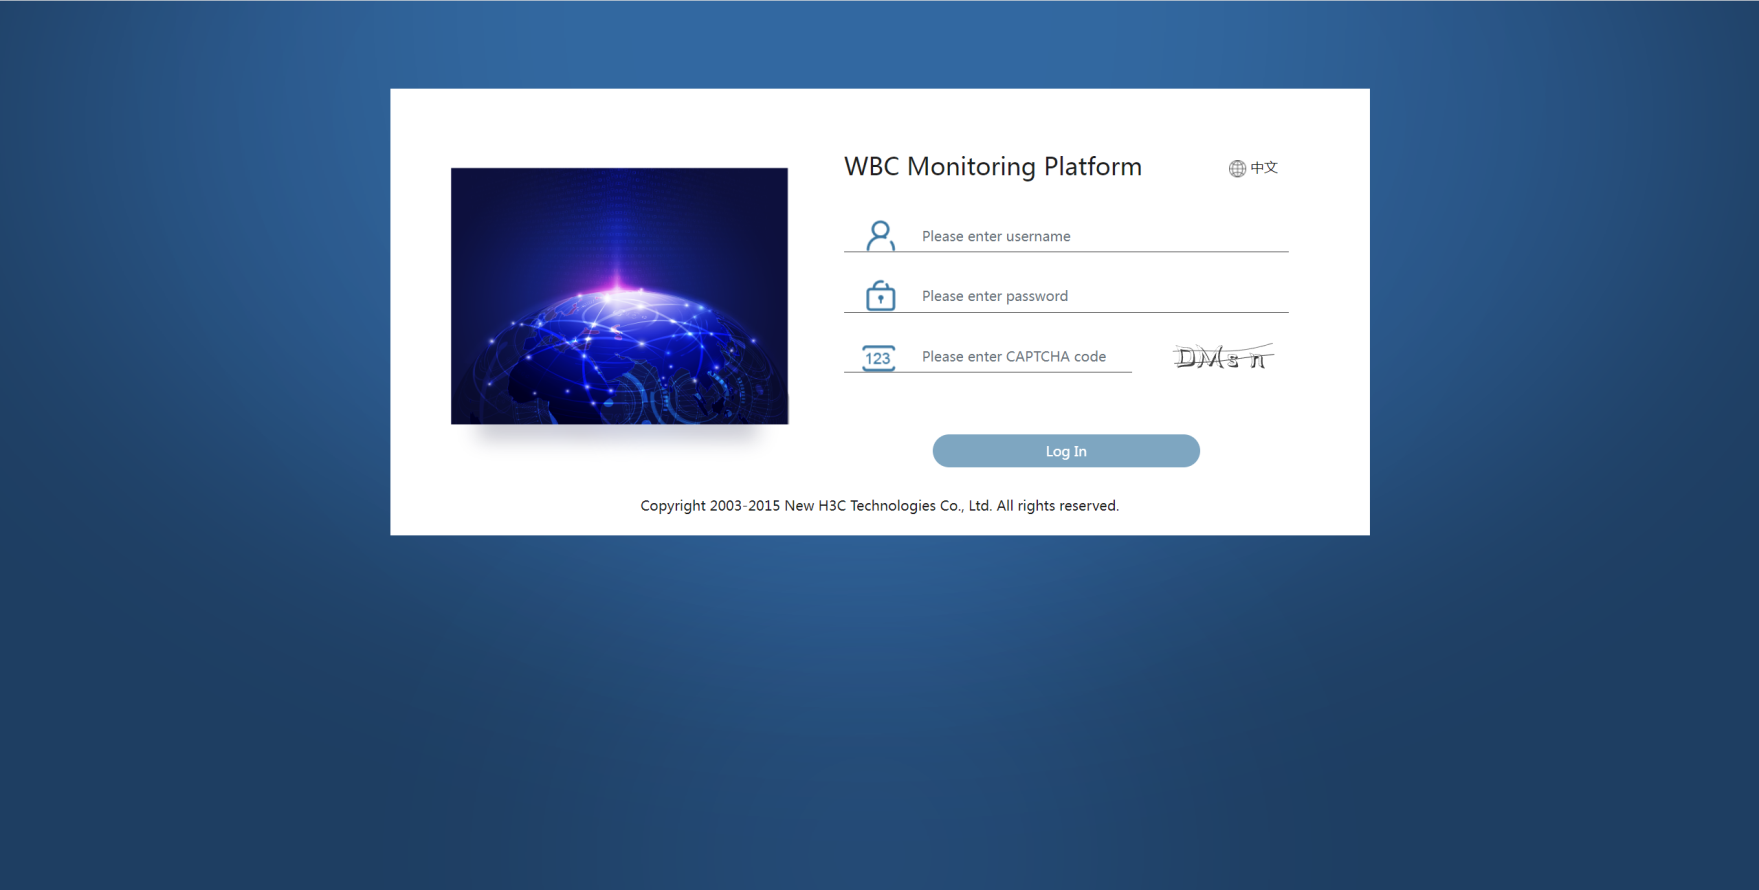
3. Enter the username, password, and CAPTCHA code. The default username and password are admin and admin.Default.0506, respectively. Then, click the login button.
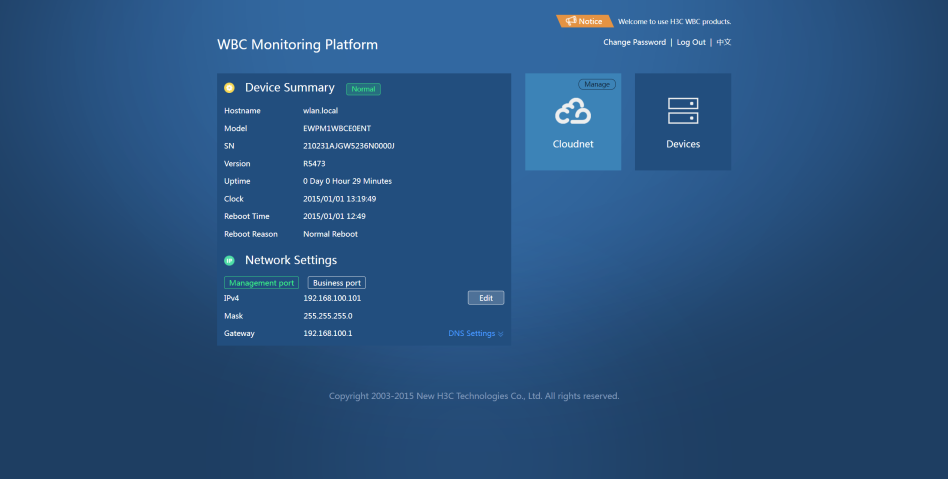
4. Edit the IP address of the management port as needed.
Figure3-4 Editing the IP address of the management port

Logging in to the WBC monitoring platform from the service port on the module
1. Set up the network environment as shown in the following figure. Configure IP settings to ensure the connectivity between the PC and the internal service port on the WBC module.
|
|
NOTE: · When you install the module in slot 1 on the rear panel of the AC, the corresponding internal service port is GE1/0/17. · When you install the module in slot 2 on the rear panel of the AC, the corresponding internal service port is GE1/0/18. |
Figure3-5 Setting up the network environment

2. Use an Ethernet cable to connect the PC to a Layer 2 Ethernet port on the AC. Configure IP settings for the PC, AC, and WBC module and make sure they have connectivity to each other.
3. Enter https://x.x.x.x:9999 in the address bar of a browser. x.x.x.x represents the IP address of the service port on the module, which is 172.25.252.18 by default. Enter the username and password on the login page. The default username and password are admin and admin.Default.0506, respectively. Then, click the login button.
Figure3-6 WBC monitoring platform
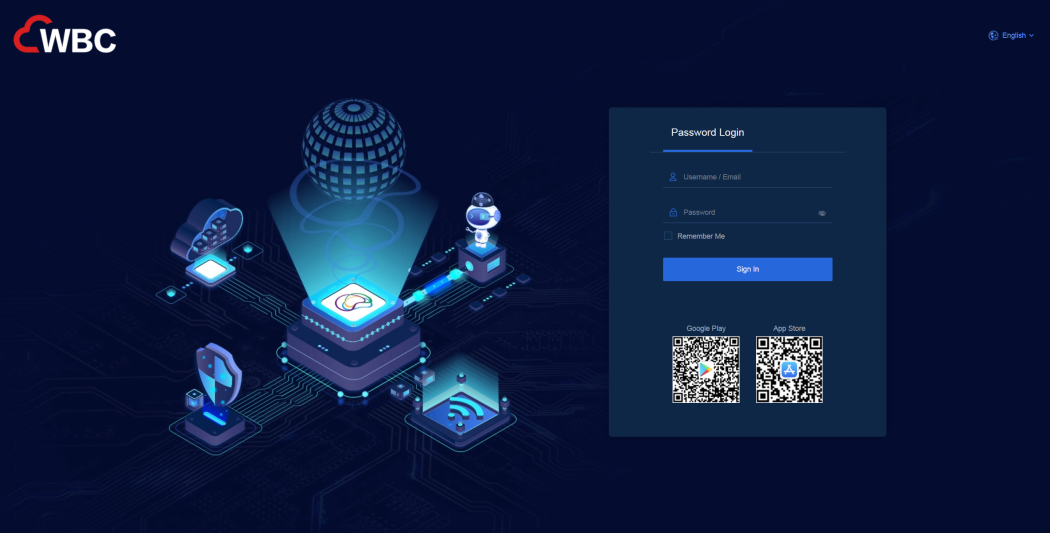
Logging in to the Cloudnet platform
The WBC module comes with a built-in localized Cloudnet platform, supporting device management, client statistics, flexible authentication, and unified O&M.
To log in to the Cloudnet platform:
1. Access the Cloudnet platform login page by using either of the following methods:
· Click the Cloudnet icon on the WBC monitoring platform.
· Enter https://x.x.x.x:31443 in the address bar of a browser. x.x.x.x represents the IP address of the Cloudnet platform, which is 172.25.252.18 by default.
2. Enter the username and password, and then click the login button. Both the default username and password are wbcadmin.
Figure3-7 Cloudnet platform login page